

Inspired by HGTV and TikTok, two roommates test their luck at flipping furniture on Facebook Marketplace. Follow along as Lila and Addi tackle the best Central Iowa has to offer.
Flip #2
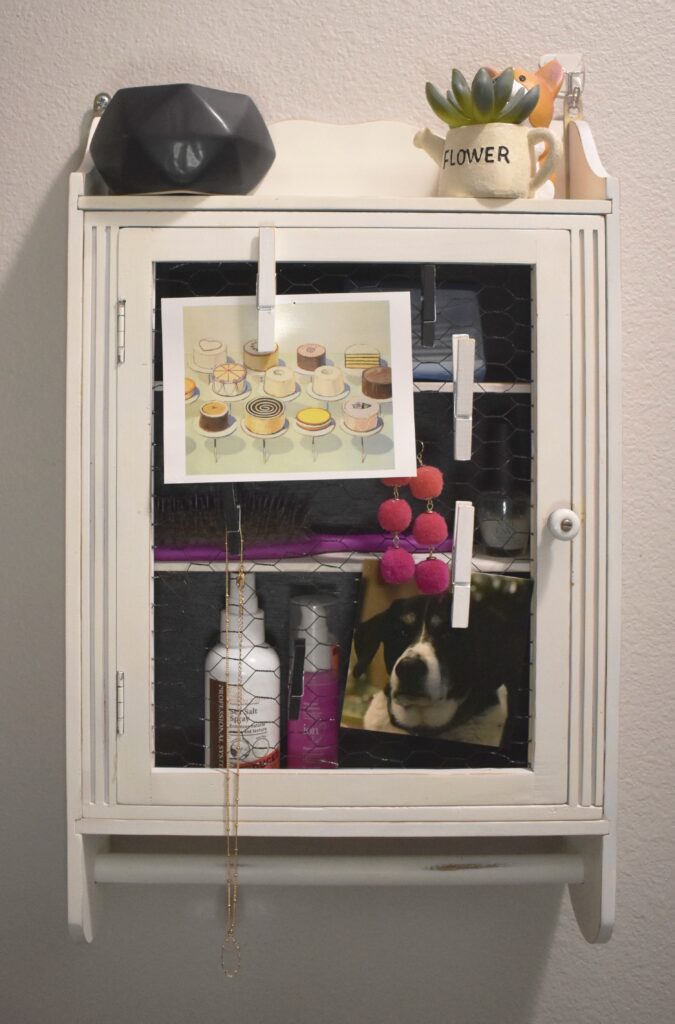
Not going to lie, I had little faith in the shabby medicine cabinet Lila excitedly told me we had to have. After purchasing it, I wasn’t feeling any better about it. With duct tape barely holding the front together, and an eyesore of questionable red fabric on the back, my arms weren’t aching to reach for any tools for what appeared to be a waste of time. She claimed that the structure was sound and that with “good bones,” it had potential. Who was I to crush her dreams?


We found the medicine cabinet at Goodwill of Central Iowa. Everything in the store is priced based on weight. At $1.59 per pound, along with other furniture and clothing finds, our total was $38.16. While we may not know exactly what we paid for it, we decided to weigh it and estimate. Using a run-of-the-mill body scale at home, we concluded that the medicine cabinet weighs 2.5 pounds. I’m no mathematician, but at $1.59 per pound, that would mean we paid approximately $4.
Pre-Work
The vision for the medicine cabinet was to paint it white and apply a farmhouse finish. To drive the distressed look home, we took the duct taped wood piece off the front and replaced it with chicken wire.
Compared to our first flip, an entryway shelf, more supplies were needed. We used:
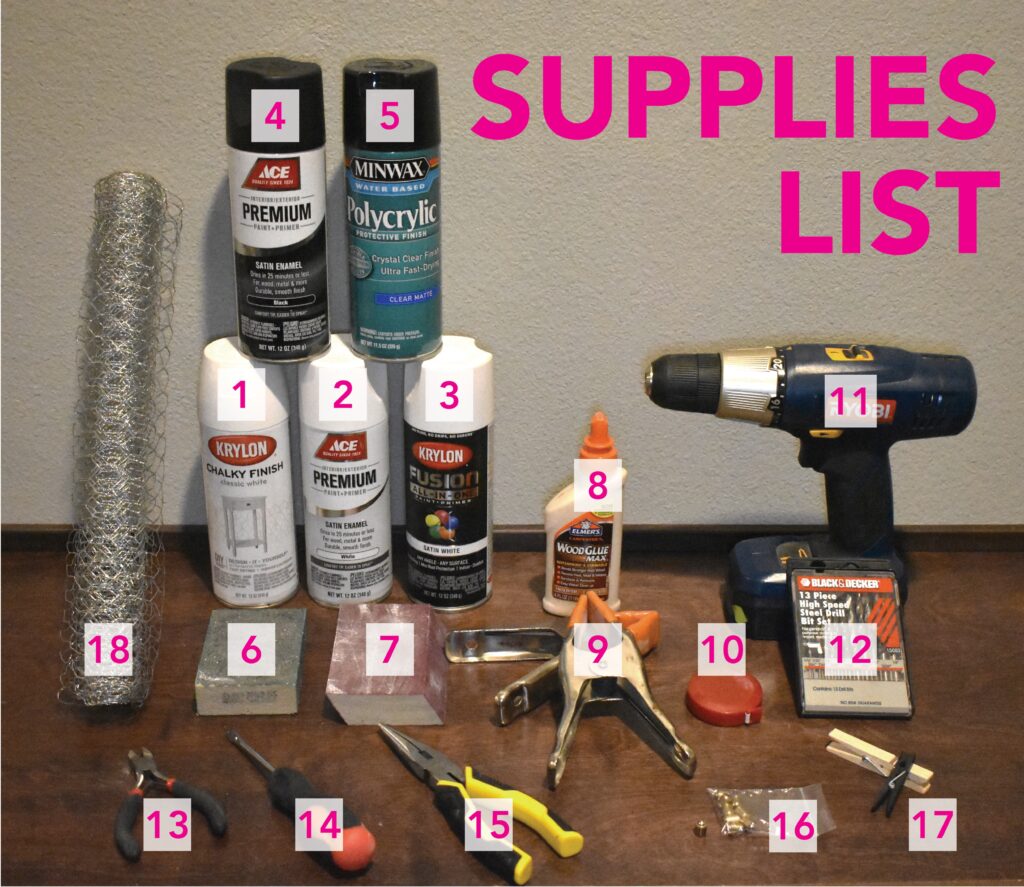
- White Spray Paint
- White Spray Paint
- White Spray Paint
- Black Spray Paint
- Polycrylic Sealant
- 60 Grit Sanding Sponge
- 150 Grit Sanding Sponge
- Wood Glue
- Clamps
- Tape Measure
- Battery Powered Drill
- Drill Bits
- Wire Cutters
- Flathead Screwdrivers
- Needle Nose Pliers
- Chicken Wire
- Bullet Catch
- Clothes Pins
- Paper Towels
- Scrap Wood
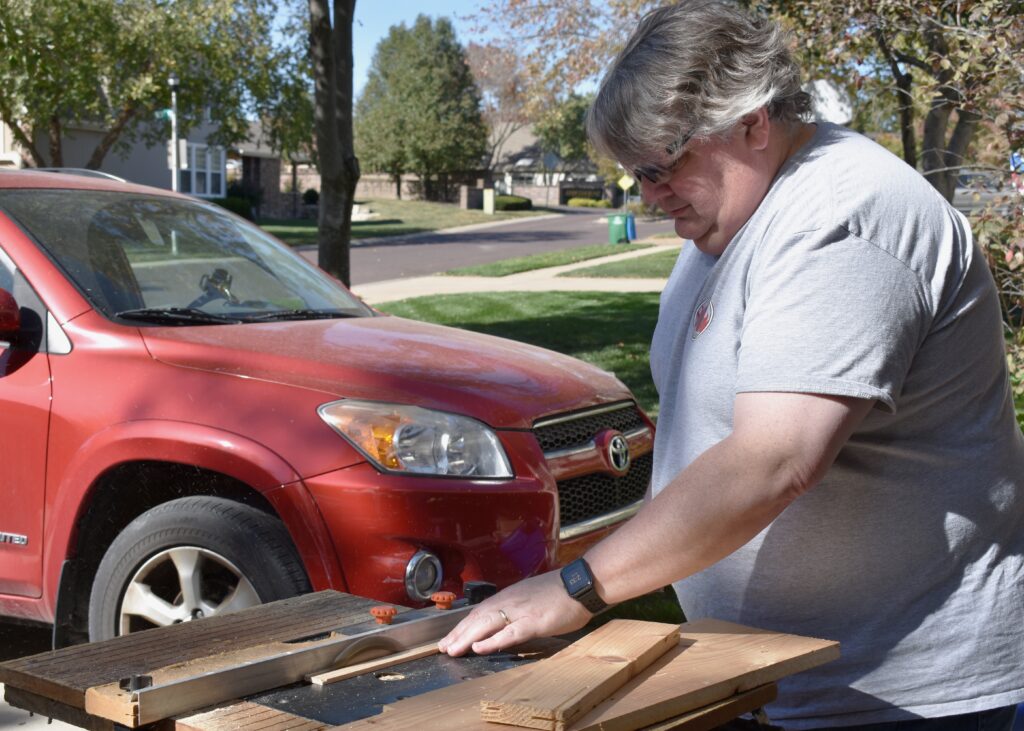
- Saw (We used a table saw Lila’s dad bought on Facebook Marketplace)
DIY
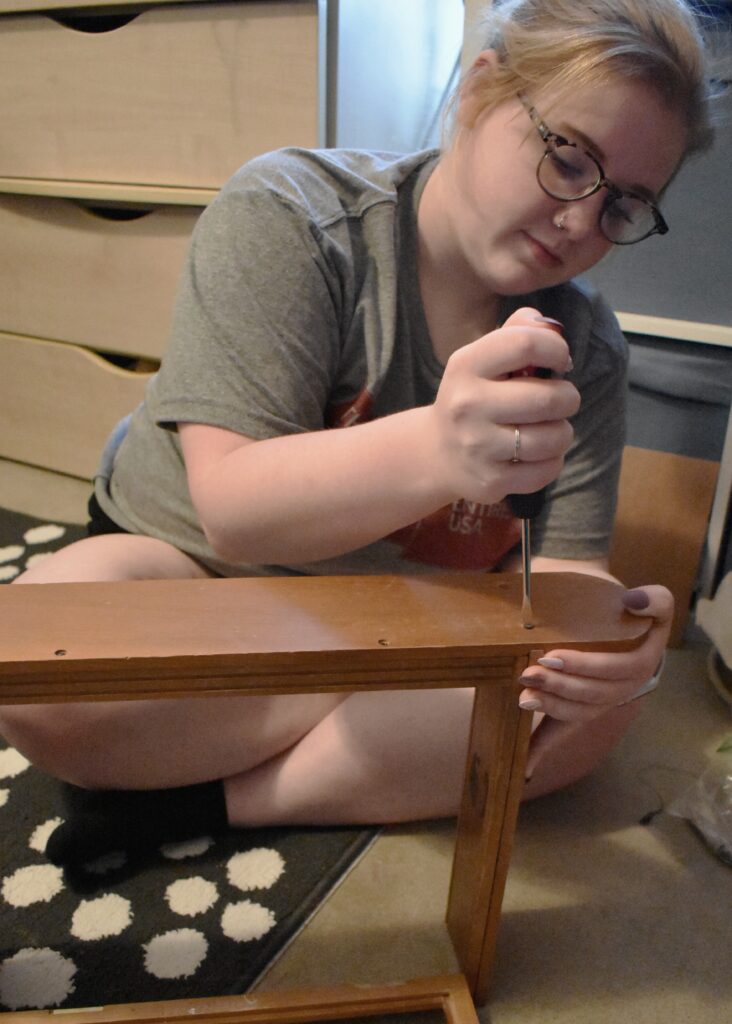
Lila’s heart skipped a beat the second she caught a glimpse of the medicine cabinet—she could hardly wait to get her hands on it. Her first order of business was to take the cabinet apart. This time we counted how many screws we had before putting them in a bag—did not want to relive the screw debacle of the entryway shelf. It was easy to take apart, and the red fabric on the back ripped off with no issue.
With each piece by its lonesome, and after further inspection, we decided the next step was to give it a good sand using a 60 grit sanding sponge, followed by a 150 grit sanding sponge. Each piece was covered in layers of sanding dust, so we rinsed each thoroughly before leaving them to dry outside for a few hours.
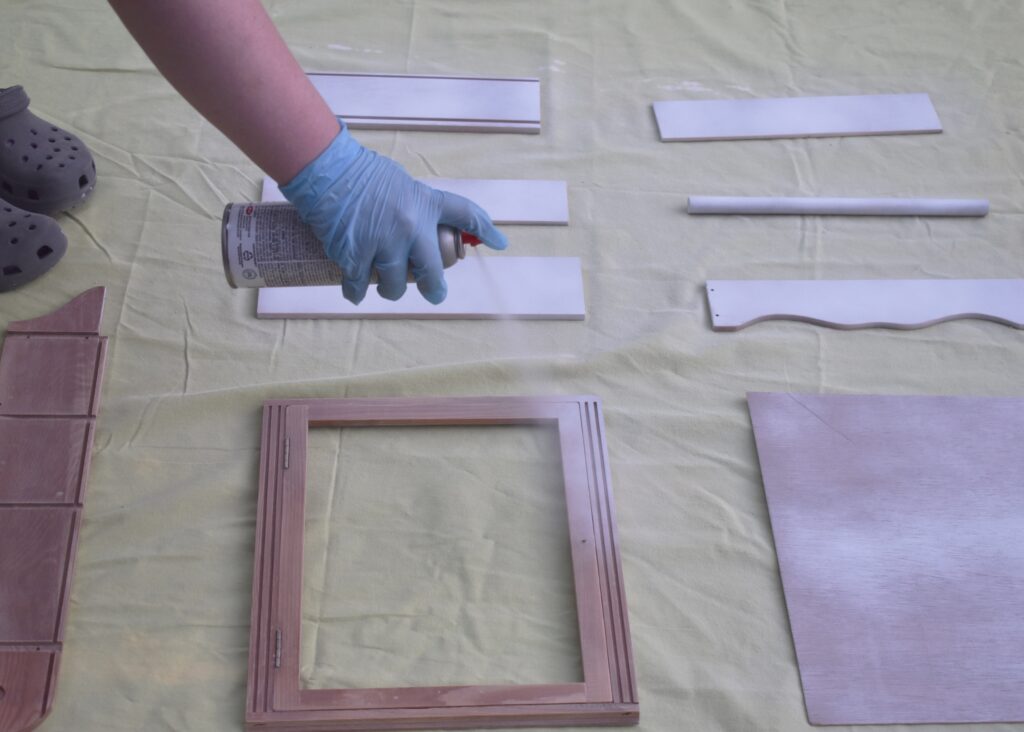
Next, we moved on to spray painting everything white—except for the back piece of wood that originally had the red fabric. Two coats went on the first side with 30-45 minutes in between coats. The plan was to flip the pieces over and do the same to the back. However, after almost making it through one coat on the back, we were out of spray paint.
Pro tip: Don’t just guesstimate how much spray paint you might need—it’s better to have too much than too little.
Since we were effectively stalled until we could pick up more spray paint, we ordered the chicken wire online to speed up the process. The next day Lila took a trip to the local Ace Hardware store to buy a can of white and a can of black spray paint. After two more coats on the backside, we were out of another can of white. Everything except the sides were how Lila wanted them to look.
Pro tip: Don’t try to spray paint in the dark no matter how eager you are to continue a project—it doesn’t go well.
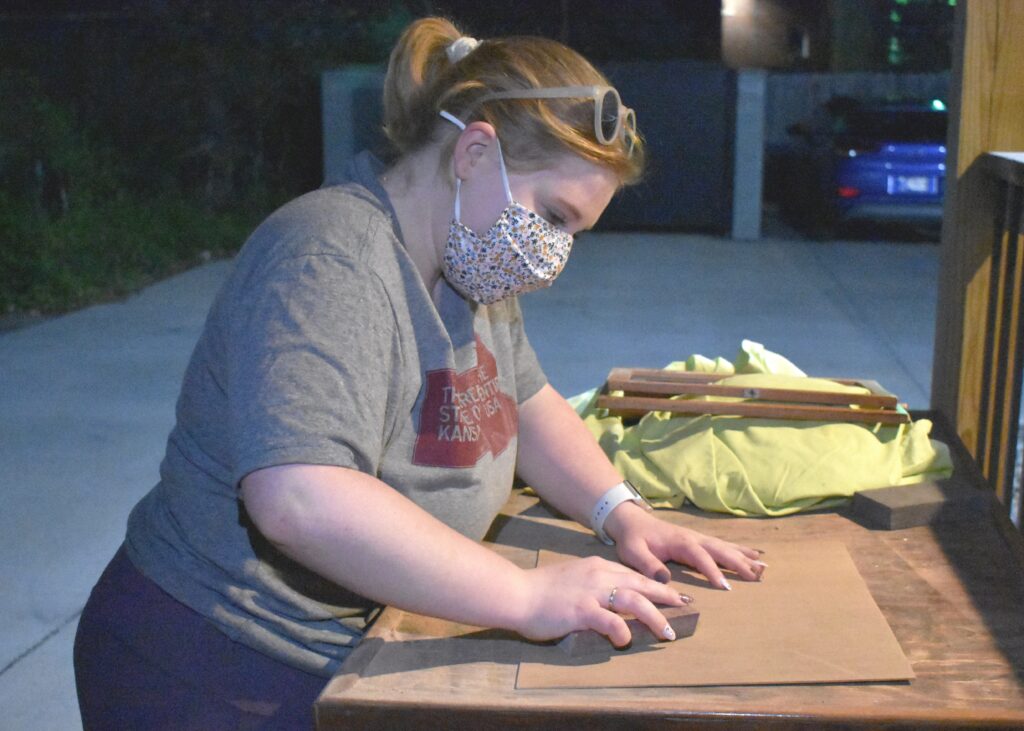
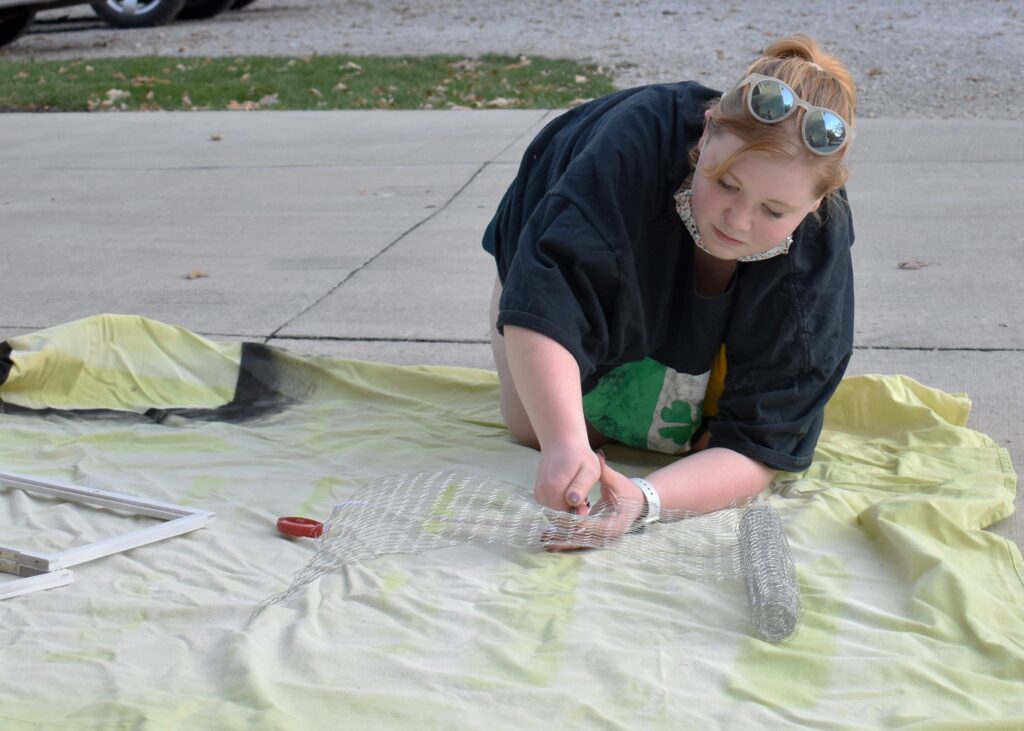
The contrasting black inside back piece had all the drama Lila had dreamed of. At this point, she could hardly contain herself and started lightly sanding the sides of the cabinet to get a weathered farmhouse look, but she had to come to terms with reality that another can of white spray paint was needed to cover the sides more fully and evenly. In the meantime, she measured, cut, and spray painted the chicken wire black.
Due to waiting too late in the day to get spray paint, we went to Lowes this time. Now we’ve used three different kinds of white spray paint.
Pro tip: Just choose one and buy enough, otherwise the colors might not match up. We lucked out only because we used white spray paint, which is universal.
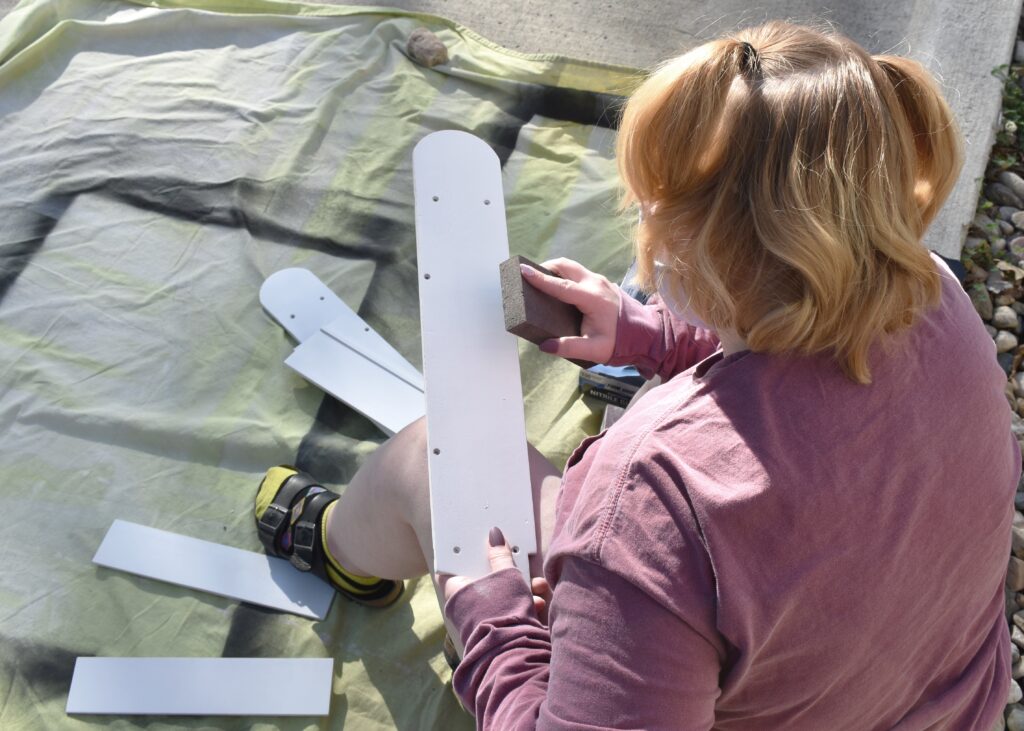
Yet another round of white spray paint and painstaking waiting passed, and the farmhouse sanding finally resumed. Youtube videos inspired Lila’s calculated scuffing with the 150 grit sanding sponge. Scuffing produced a hoard of paint dust that had to be wiped down afterward to prep for two coats of polycrylic sealant, the same sealant from our first project surprisingly.
Admittedly, Lila went home for part of this project, so I wasn’t able to help with everything. However, she did bring in a special guest to lend a hand—none other than her dad, Brad Johnson. An aspiring master craftsman himself, he was called in to assist with the chicken wire frame. He helped measure the cabinet door inset, cut pieces of scrap wood, and sandwiched the chicken wire in the door frame by stapling and gluing it in place. Lila then clamped the wire down to help it set overnight. This was done to give the chicken wire area a cleaner finish by avoiding exposed edges.
At this point, the only challenge left was to put it all back together. Lila eventually came back so that I would be there for the finishing touches. Something about the chicken wire wasn’t quite right though—it was just a hair too short and wouldn’t completely stretch across the door frame. So Lila spent hours obsessing over it and trying to make it perfect. By carefully adding leftover chicken wire, she was able to troubleshoot the issue.
During the chicken wire endeavor, some spray paint chipped off. Rather than trying to spray paint anything again, we decided to give the chicken wire a touch-up coat of regular black acrylic paint.
Pro tip: Wear gloves to avoid being poked or stabbed by chicken wire.
Eventually Lila reached a point where it was acceptable and rebuilt the shelf, but we weren’t done just yet. The door didn’t close the easiest, so she wanted to add a bullet catch to make it smoother. Drilling the hole straight and deep enough proved to be more challenging than expected. Using pliers as a file, filling in the small gap with some spackle, and taking a breather to pout helped reinvigorate our desire to finish the project strong. Of course, the bullet catch we originally got was too big. We had to order smaller ones from Amazon. It was a learning experience. With the smaller catches, we sawed part of a dowel rod, wood glued it into the hole, and installed the bullet catch. This time it worked perfectly, and the door closed with ease.
When it was finally done, it looked full of life compared to the sad condition we found it in just weeks before. The cabinet was ready to be staged and sold.


Selling
Lila’s feeling ambitious and wants to start the listing at $65 on Facebook Marketplace. Our first item had over 300 listing views and 12 saves, so with a completely different, brighter look, we’ll compare how potential customers interact with this listing. To stage the shelf, we painted a few clothespins white to match.

Has it Sold?
Not yet. We decided to boost the post, so now we wait.
What’s next?
Our third flip is going to be a wooden handled tray. We’ll also be posting smaller DIY projects on TikTok at @urbanplains.
What a lovely cabinet. I think the picture I took of Lila cutting chicken wire looks great in this article!