

Inspired by HGTV and TikTok, two roommates test their luck at flipping furniture on Facebook Marketplace. Follow along as Lila and Addi tackle the best Central Iowa has to offer.
Flip #1
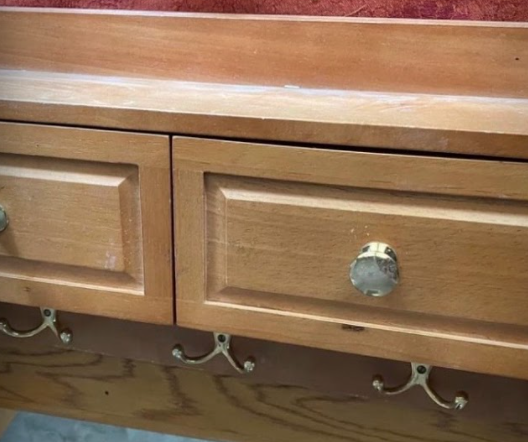
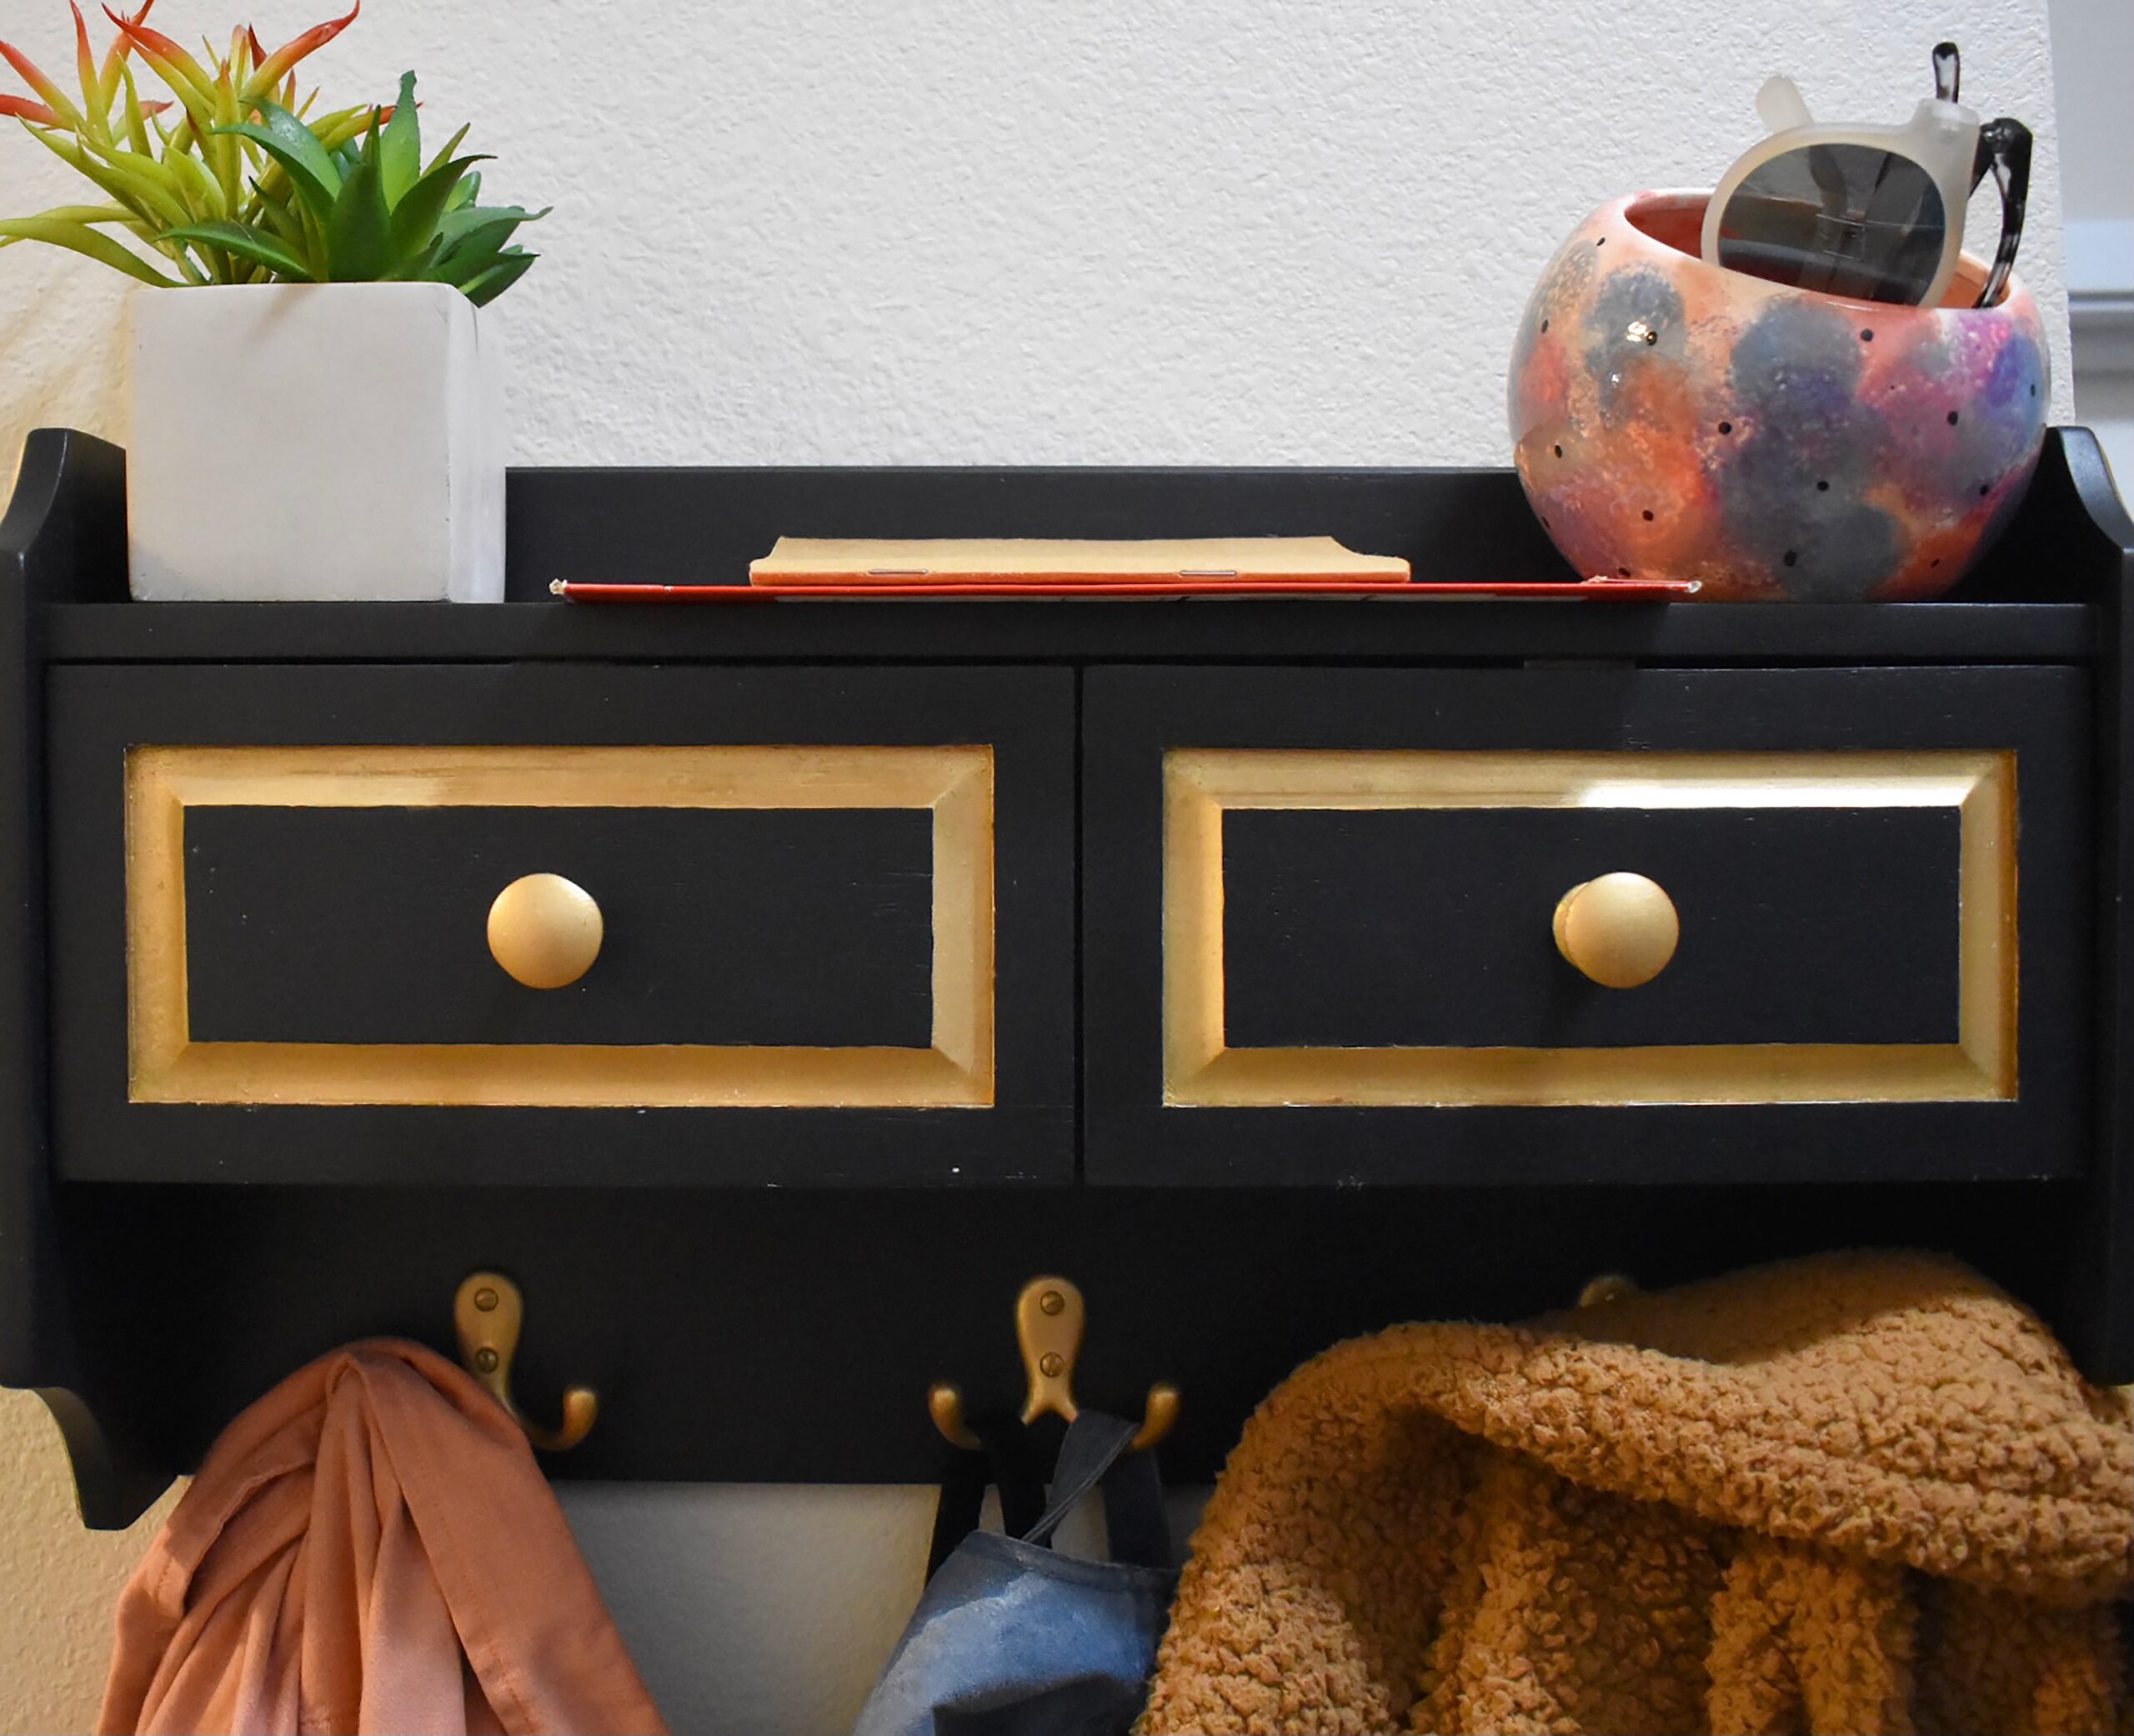
Our first flip was an entryway shelf featuring hinged cubbies and two pronged hooks for hanging clothing. It was well made, in great condition, and looked like a natural wood finish, but the seller felt the look was outdated. However, we knew that with a few simple changes, this shelf could be given an updated, modern look.
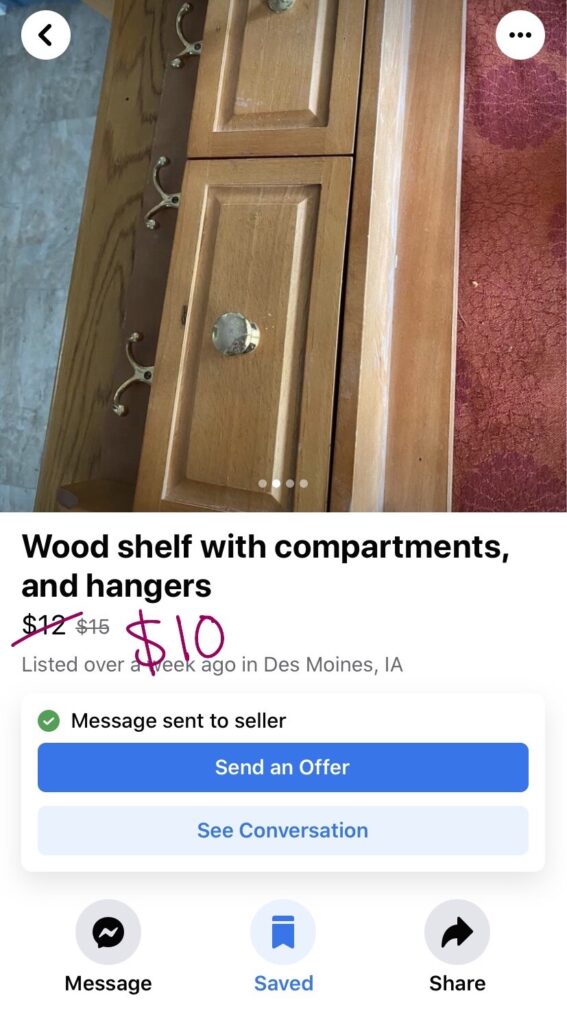
Purchased for $10, we picked up the shelf from a neutral meeting point near Highland Park in Des Moines.
Pre-Work
Before we could get started, we had to come up with a vision and acquire the tools to make it happen. Lila came up with the vision for this project—I was there for moral support. Her idea was to sand off the current finish, paint the shelf black and all the knobs and screws gold, add distressed gold touches, and create a more modern, sleek appearance overall. To achieve this look, we needed:
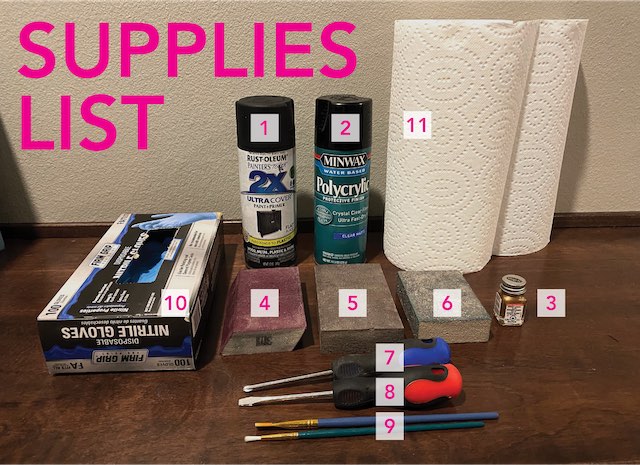
1- Spray Paint, Flat Black ($3.96)
2- Polycrylic Sealant, Clear Matte ($11.97)
3- Gold Enamel Paint ($1.69)
4- 150 Grit Sanding Sponge ($2.79)
5- Extra Fine/Fine Grit Sanding Sponge ($3.45)
6- 60 Grit Sanding Sponge ($3.19)
7- Phillips Head Screwdriver
8- Flat Head Screwdriver
9- Paintbrushes
10- Gloves
11- Paper Towels
DIY
Naturally, the first point of action was to take the front doors off and put the screws and knobs away for safekeeping. Once that was ready, it was time to get our hands dirty.
Pro tip: It’s best to use protective glasses and a mask to keep from inhaling sawdust or getting it in your eyes.
First, we hit it with a mouse sander to generally sand as much of the shelf as possible in order to wear down the current finish to be smooth for painting. Second, sanding sponges were used to complete the harder to reach areas to ensure an even sand overall. We used 60 grit, 150 grit and extra fine/fine grit sanding sponges. Once finished, we wiped down all sanded areas with a moist paper towel to minimize sawdust residue. If you skip this step, the paint will not go on evenly, and dusty areas will ruin the finish and/or desired look.


We decided to use a flat black spray paint to cover the shelf. It took three coats to achieve our desired matte finish. An hour after the first coat, we added a second. The third was added 24 hours after that. When the shelf was completely dry, it was time to add two coats of gold enamel paint details. All knobs, hooks, and screws were coated in gold, as well as the inside trim of the doors and the skinny trim on the sides of the shelf.


Like any good project, we ran into a small hiccup—though this one was definitely our fault. Even though we did most of our work outside, we hit the gold trim inside. As we were working, the paint spilled all over our rug. Luckily, a simple Google search led us to mycarpetpal.com. Frantically scooping the paint out of the rug with a spoon and going to town with a Shout stain remover bottle did the trick. Besides one white polka dot looking slightly dingy, it’s as good as new.
To finish up the project, the shelf was coated in four rounds of polyurethane sealant. Each coat was applied with 30 minutes in between.
Pro tip: It’s best to spray the sealant outside. Wearing a mask will also help avoid inhaling any fumes.
Part of the process included dusting and wiping down the shelf with a moist paper towel before the first round of sealant. Our final step was to reassemble the shelf after all work was completely finished and dry.
Near the end of our project, we ran into another small problem. We had misplaced one screw. Of course it was nowhere to be found, so we had to go to the local Ace Hardware Store to buy a replacement. It set us back $0.20, but was the right size. With all of our parts, we were finally able to finish rebuilding and prepare to sell our flip.
Pro tip: Count your screws before storing
them safely in a bag.


Selling
Even after finishing crafting, we weren’t quite done yet. We started to research similar items on Facebook Marketplace to get a better understanding of what would be a competitive price to list our shelf for. Other similar shelves were going for$20-$45, so we decided to list at $45. Starting high with an agreement to take at least $35 was our plan. To make our shelf more marketable, we decided to stage it for the listing photos. Nailing the shelf into a wall in our place wasn’t an option, so we had to get creative. There’s one screw sticking out of the wall next to our room where a photo used to be, so we decided to hang up half of the shelf on that. Then, we made our roommate Emma hold the other end up and covered her hand with a jacket, which we just chopped off in Photoshop after. You can’t even tell.


Has it Sold?
Not yet. After two days, there had been one bidder. If it sits for a week, then we’ll lower the list price and see if that generates new interest.
What’s next?
Follow along to see our profit from our first project as we get started on our second project – a medicine cabinet. We’ll also be posting smaller DIY projects on TikTok at @urbanplains.